
Re:amaze offers a WordPress plugin that integrates with your website to enhance customer communication and support through features such as chat.
Install the WordPress plugin
Log into your WordPress dashboard and navigate to Plugins, then select Add New.
In the plugins directory, search for Re:amaze and select Install Now.
Once the plugin is installed, select Activate to enable it.
After activation, you will be taken to the plugin's Settings page. To connect your Re:amaze account, provide your Re:amaze Account ID and Secret SSO Key.
To retrieve your SSO Key, navigate to Settings > Account IDs and Secret in Re:amaze and select Show Secret to display your key.
To fully integrate Re:amaze with your WordPress site, select the Personal Settings tab within the plugin's Settings page. Enter your Re:amaze login email address and API Key. This allows you to create conversations directly from the Re:amaze dashboard.
Make sure the email address you provide matches your Re:amaze login email. To find your API Token, navigate to Settings > API Token in Re:amaze and copy the token from that page.
Save your changes and refresh your site to confirm the integration. You should see the Re:amaze Lightbox Widget deployed on your site.
Create conversations from comments
You can create Re:amaze conversations directly from WordPress comments. Hover over an active comment and select Create Re:amaze Conversation.
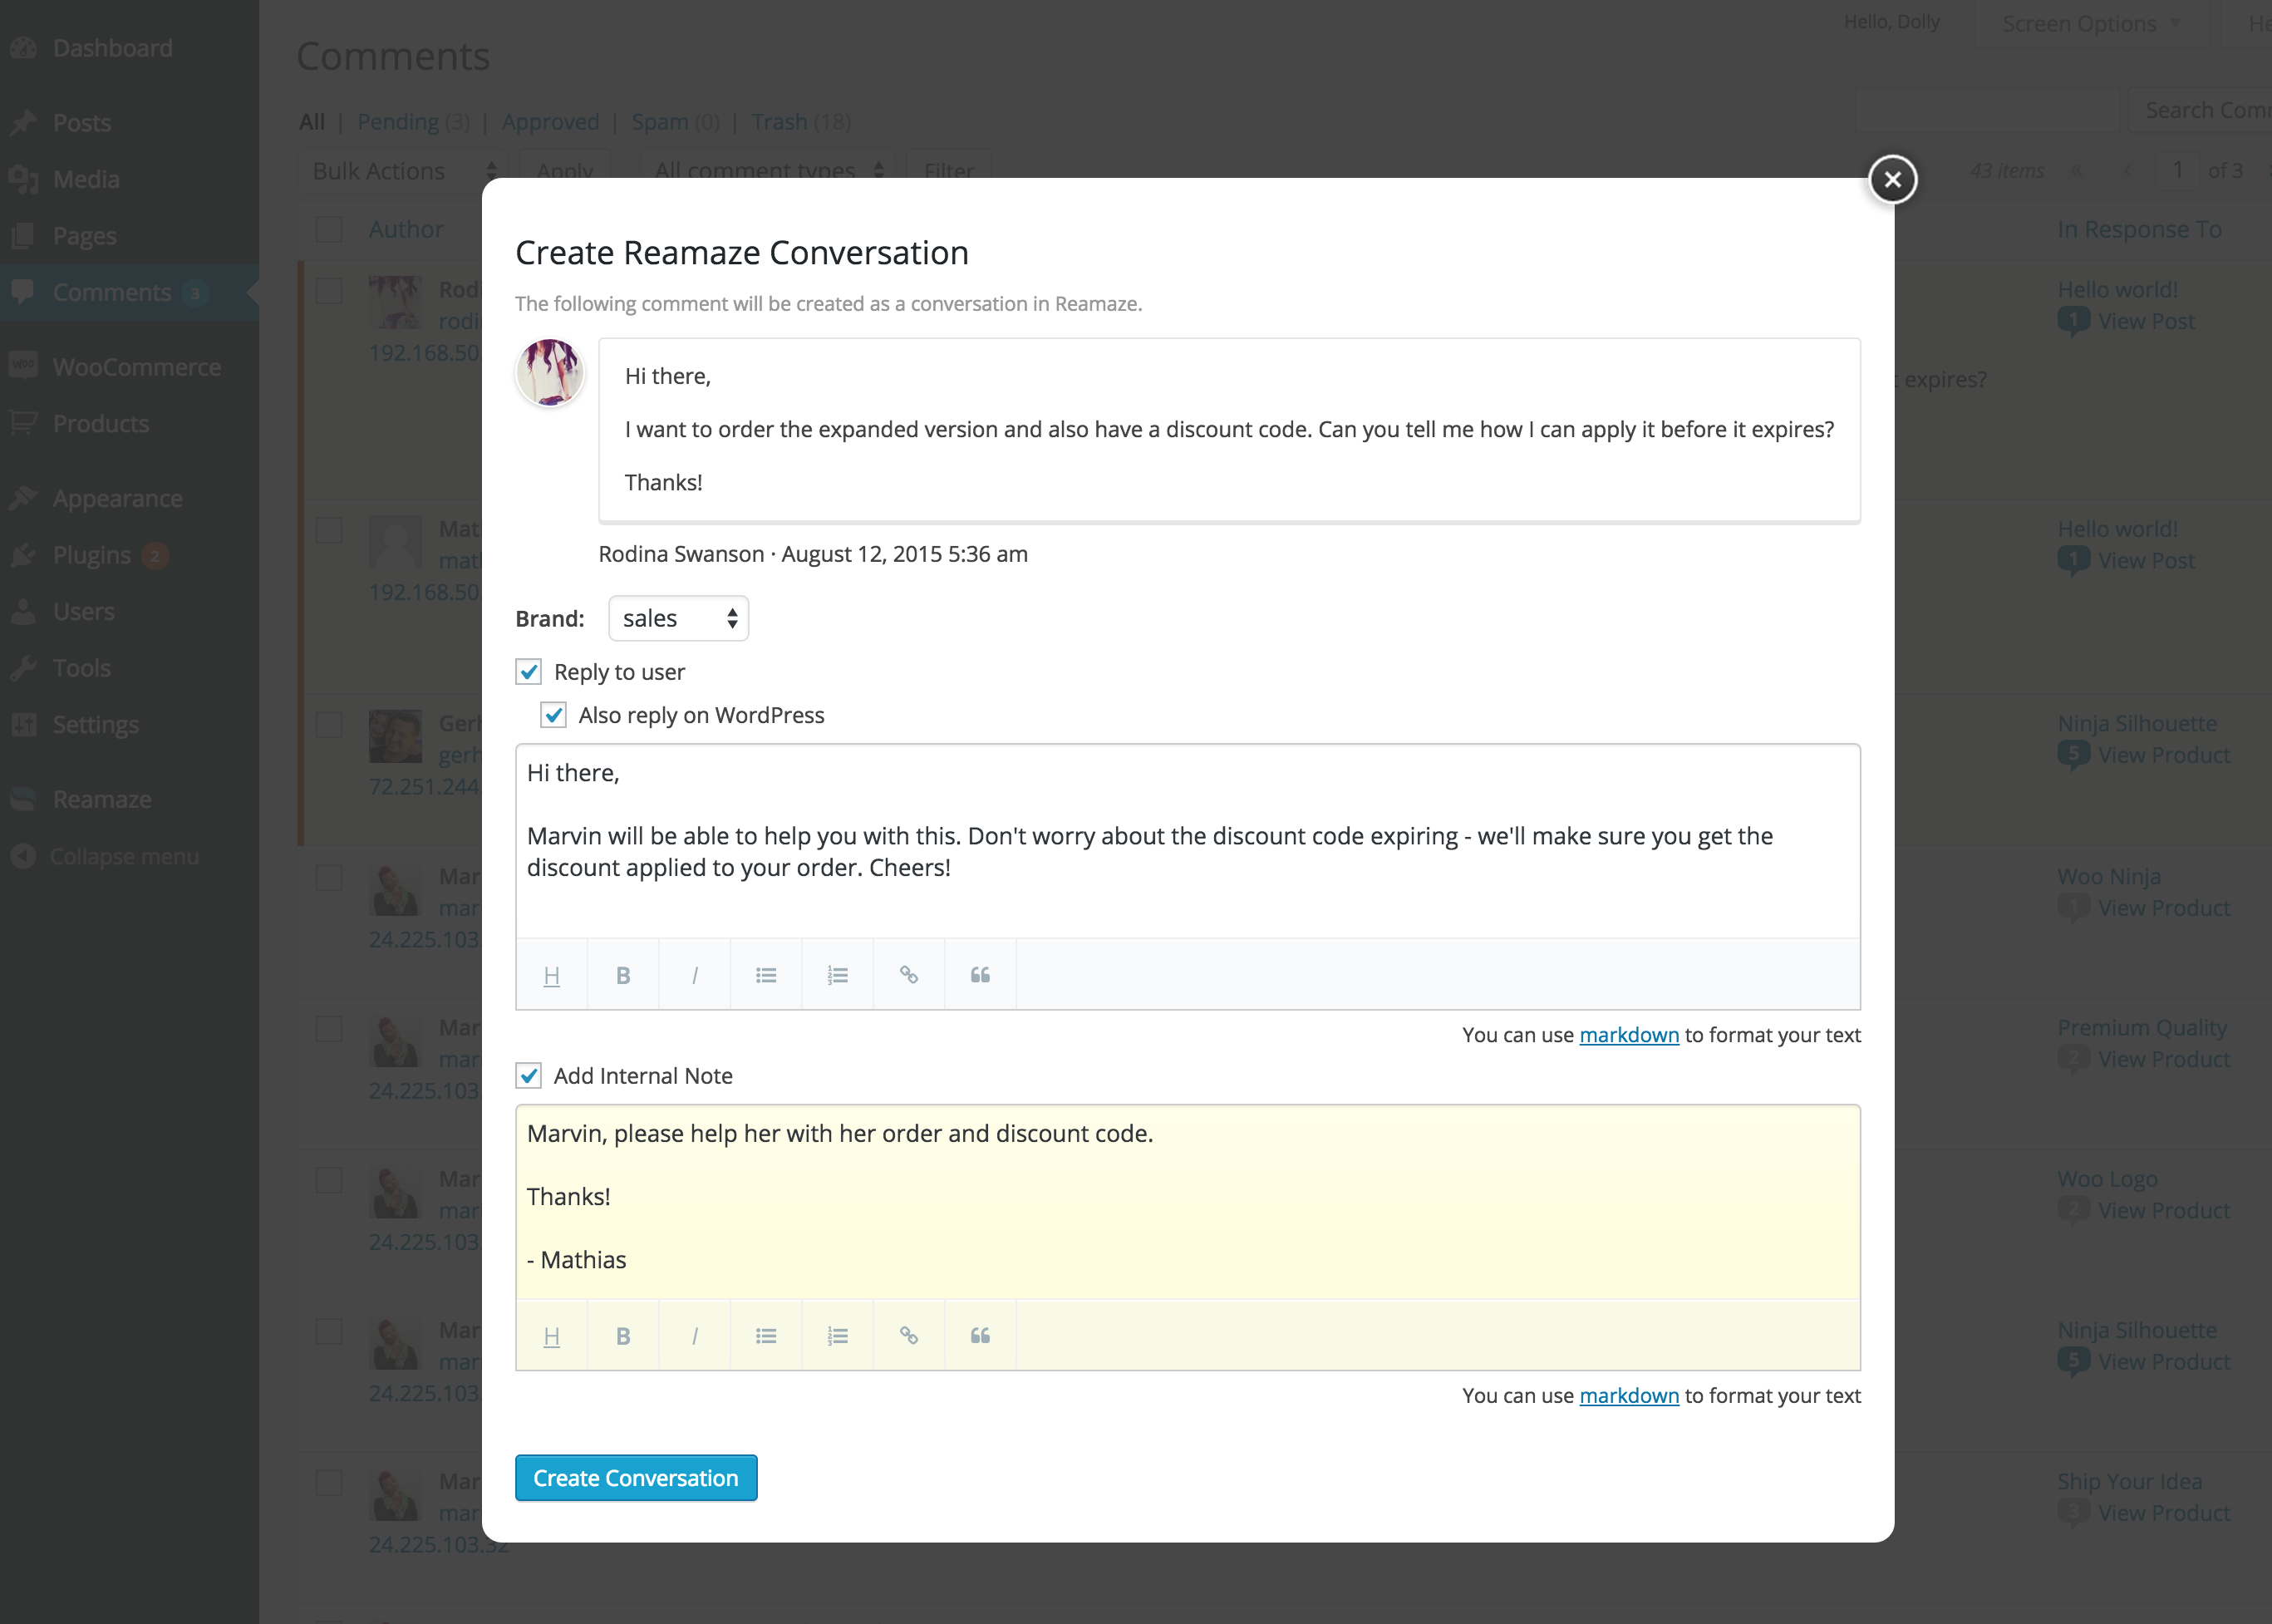
From here you can create the conversation under a specific brand, reply to the customer, reply on WordPress, or leave an internal note for a team member.
What went wrong? (Optional)